So you want to try MongoDB, but you're not sure how to create a database. You're in the right place.
In this article, we will cover how to create a database using the MongoDB Atlas UI (User Interface), the MongoDB Shell (mongosh) REPL (Read-Eval-Print-Loop) , or using Compass, the MongoDB GUI (Graphical User Interface). All methods are available for MongoDB Atlas, the database-as-a-service offering by MongoDB, and for self-managed clusters.
Table of Contents
Using the MongoDB Atlas UI
The easiest way to get started with MongoDB is using Atlas, the database-as-a-service offering by MongoDB. A free tier is available with basic database functionalities. This free tier is more than enough for the purposes of this article.
Prerequisites for MongoDB Atlas
To create a database on MongoDB Atlas, you will need:
- Make sure your IP is on the Whitelist.
- Make sure you have a user account and password on the MongoDB cluster you want to use.
- Open a browser and log in to https://cloud.mongodb.com
Creating a MongoDB Database with the Atlas UI
From your cluster page, click on “Browse Collections”.
.png?auto=format%252Ccompress)
If there are no databases in this cluster, you will be presented with the option to create your first database by clicking on the “Add My Own Data” button.
.png?auto=format%252Ccompress)
This will open up a modal, asking you for a database name and collection name. Once these fields are filled, click on “Create” and your database will be created for you.

The database is now available to you. You can manually enter new documents, or connect to the database using any of the drivers.
Using the MongoDB Shell
Like most complex software systems, MongoDB can be controlled with what is called a command-line interface, often referred to as a CLI.
By entering commands into the CLI, you tell MongoDB how to operate, get information about how the MongoDB cluster is running, and perform fundamental actions like the one we will cover today: creating a database.
To create a database using a command-line interface, the first task is to get access to the MongoDB cluster you are using via the MongoDB Shell. A shell is a program that allows you to enter commands into a software system.
Prerequisites for Using the CLI with MongoDB Atlas
If you are using MongoDB Atlas, the steps to getting a shell are as follows:
- Make sure your client has TLS and is on the Whitelist.
- Make sure you have a user account and password on the MongoDB cluster you want to use.
- Make sure you have the MongoDB Shell installed on your computer.
- Go to the command prompt for your system.
- Run the mongosh command to start the shell and log in to the MongoDB Atlas cluster.
Find out more at Connect to Atlas via Mongo Shell
Prerequisites for Using the CLI with a Self-Managed MongoDB Cluster
If you are running a self-managed cluster of MongoDB:
- Make sure the MongoDB self-managed cluster is installed and running on your computer or the computer you are going to connect to.
- Make sure you have a user account and password on the MongoDB cluster you want to use.
- Make sure the MongoDB Shell is installed on your computer. Go to the command prompt for your system.
- Run the mongosh command and log in to the MongoDB self-managed cluster.
Find out more at Using the MongoDB Shell in Community Edition
Creating a MongoDB Database with the CLI
Once you have access to a cluster via the MongoDB shell, you can see all the databases in the cluster that you have access to using the “show” command:
> show dbs
admin 0.000GB
local  0.000GB
Note that admin and local are databases that are part of every MongoDB cluster.
There is no “create” command in the MongoDB shell. In order to create a database, you will first need to switch the context to a non-existing database using the use command:
> use myshinynewdbNote that for now, only the context has been changed. If you enter the show dbs command, the result should still be the same:
> show dbs
admin 0.000GB
local  0.000GB
Wait a second. Where’s myshinynewdb?
MongoDB only creates the database when you first store data in that database. This data could be a collection or even a document.
To add a document to your database, use the db.collection.insert() command.
> db.user.insert({name: "Ada Lovelace", age: 205})
WriteResult({ "nInserted" : 1 })
A couple of notes. The “user” in the command refers to the collection that the document was being inserted in. Collections in MongoDB are like tables in a SQL database, but they are groups of documents rather than groups of records.
Collections can be created just like databases, by writing a document to them. They can also be created using the createCollection command.
WriteResult({ "nInserted" : 1 }) indicates that the document was added to the collection.
Now if you run the show dbs command you will see your database.
> show dbs
admin 0.000GB
myshinynewdb 0.000GB
local  0.000GB
There’s one more thing.
How did the insert command know to put the data into myshinynewdb?
It turns out that when you entered the use command, then myshinynewdb became the current database on which commands operate.
To find out which database is the current one, enter the db command:
> db
myshinynewdb
The db command displays the name of the current database. To switch to a different database, type the use command and specify that database.
Using the GUI, MongoDB Compass
Some users would rather work with a GUI to create and update their data and collections. The MongoDB GUI, Compass, offers additional functionality like data visualization and performance profiling as well as offering CRUD (create, read, update, delete) access to data, databases, and collections.
Find out more at MongoDB Compass: The Easiest Way to Manage and Explore Your Data
Prerequisites for Using Compass with MongoDB Atlas
If you are using MongoDB Atlas, the steps to getting to Compass are as follows:
- Make sure your client has TLS and is on the Whitelist.
- Make sure you have a user account and password on the MongoDB cluster you want to use.
- Make sure you have MongoDB Compass installed on your computer. If not, download and install Compass for your operating system.
- Click on the icon for MongoDB Compass to start it up.
Prerequisites for Using Compass with a Self-Managed MongoDB Cluster
If you are using self-managed MongoDB:
- Make sure the MongoDB self-managed cluster is installed and running on your computer or the computer you are going to connect to.
- Make sure you have a user account and password on the MongoDB cluster you want to use.
- Make sure you have MongoDB Compass installed on your computer. If not, download and install Compass for your operating system.
- Click on the icon for MongoDB Compass to start it up.
Creating a MongoDB Database with Compass
The Databases tab in MongoDB Compass has a Create Database button.
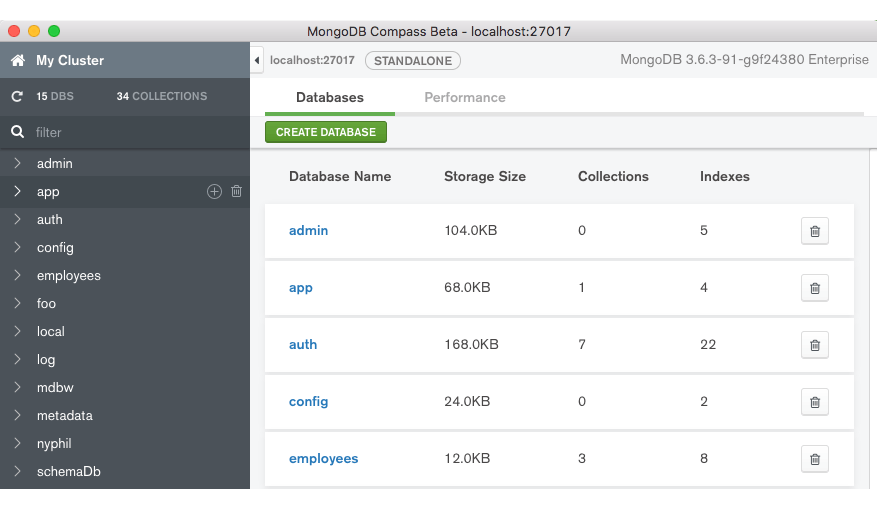
In MongoDB Compass, you create a database and add its first collection at the same time:
- Click Create Database to open the dialog
- Enter the name of the database and its first collection
- Click Create Database
Find out more here
The next step is to insert one or more documents into your database.
Click on your database’s name to see the collection you created, then click on the collection’s name to see the Documents tab:
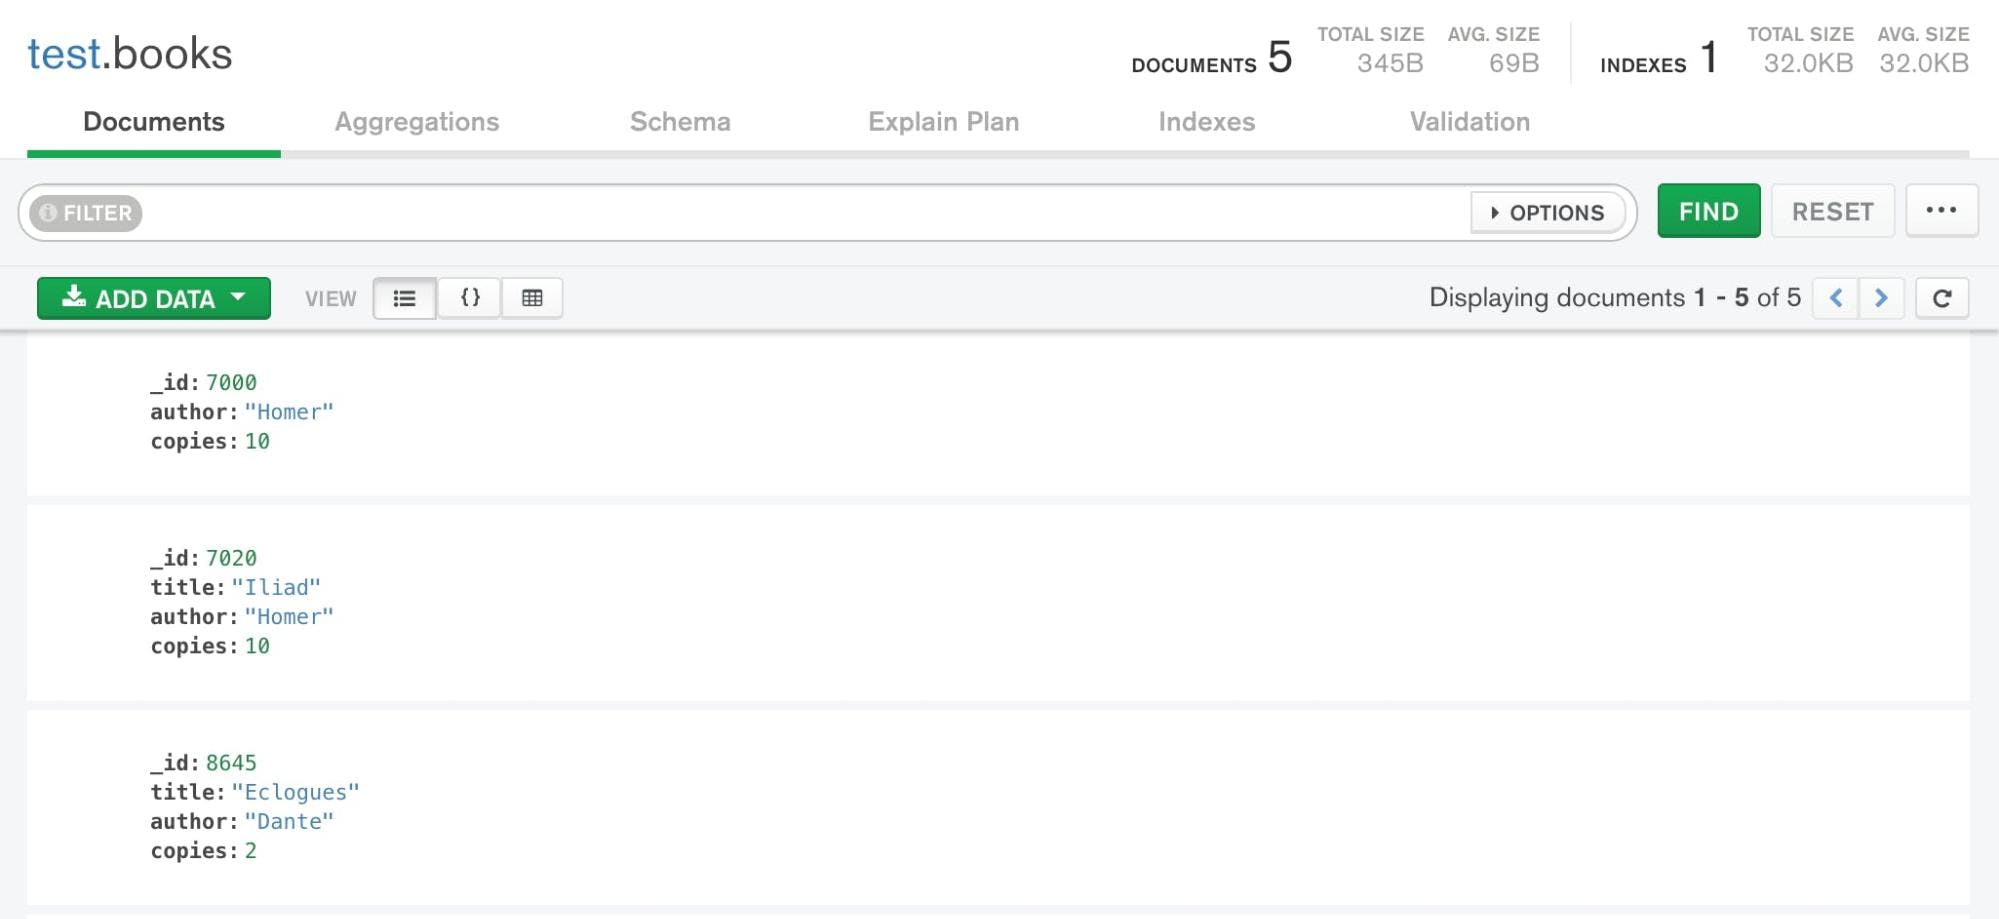
Click the Add Data button to insert one or more documents into your collection.
You can add JSON documents one at a time, or add multiple documents in an array by enclosing comma-separated JSON documents in square brackets, as shown in this example:
[
{ "_id" : 8752, "title" : "Divine Comedy", "author" : "Dante", "copies" : 1 },
{ "_id" : 7000, "title" : "The Odyssey", "author" : "Homer", "copies" : 10 },
{ "_id" : 7020, "title" : "Iliad", "author" : "Homer", "copies" : 10 },
{ "_id" : 8645, "title" : "Eclogues", "author" : "Dante", "copies" : 2 },
{ "_id" : 8751, "title" : "The Banquet", "author" : "Dante", "copies" : 2 }
]
Click Insert to add the documents to your collection.
Learn more about MongoDB
Using these simple steps shows how to create a database, a collection, and insert documents.
Now you have a database, collection, and documents to work with and can learn even more. Join the MongoDB community for forums, webinars, and free courses from MongoDB University.